Archive for April, 2009

Be prepared to be surprised

Sunday, April 19th, 2009

Photography is something I find interesting but I just don’t find the time to get into it.

From time to time I take my still camera and shoot some pictures. Most often it’s just not what want or I expect too much of it. But there are these occasions that the result surprises me; even on a subject like flowers which almost overused in pictures.

Here’s a picture of my ‘wild tulips’. I call them wild because I’m not exactly ‘strong’ in the garden. I planted these tulips bulbs more than a year ago, and was glad to see them return this year.

The tulips are nowhere compared to many other tulips, they are not behaved, they just look ‘wild’…

wildredtulip

Transfer of a domain name

Thursday, April 16th, 2009

It’s always easy to register a new domain name. Registrars are always very eager to accept new domain registrations. Obviously…

Most online and other services with recurrent fees are well organized to sell their service, but are very silent about how to cancel. Think about banking services, investment accounts, telecom providers, web hosting, and yes also domain names. I would think that this is one of the topics where law and government should impose certain rules and obligations.

However transferring a domain name from one registrar to another registrar is another story.

(more…)

Customizing a WordPress theme

Monday, April 13th, 2009

So as mentioned before, here’s part 2 of making my own theme.

I’ve already created a local WordPress install, which is not strictly necessary but allows for easy editing of the local php-files and simply clicking refresh in the browser to see the result. Rather then downloading files from the blog server, edit, re-upload and check in the preview… Not only more steps, it’s also slower.

My strategy is to take the default theme, and try to stick as much as possible with CSS modifications only.

Not sure yet if this will work out completely…

In fact the CSS file is not that hard to follow, and I need only to change header and footer backgrounds, and some minor tweaks.

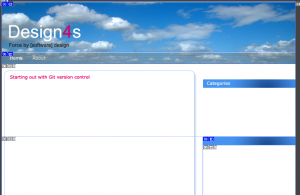
What first seemed easy wasn’t. So I took it all upside down. Starting over drawing a brand new design in Photoshop, a nice opportunity to get into some of the possibilities of this tool; found an image from my pictures library, and took it as a base for the new web design.

Finally, the images generated from slicing in Photoshop were collated to the default theme.

Preparation of the design

Preparation of the design

Then further changes were necessary beyond the CSS. Like the page menus from the sidebase had to be on top of the page. It didn’t seem obvious to do the positioning with the current html structure, so I needed to get into the php template files.

This took me quite some time, but finally I get more or less where I wanted to be with the new theme. I guess there might be some thing that have to be updated later on, but for now it should be ok.

It’s about time to publish the theme and my this blog available via the root index of the website.

Local WordPress install for dev purposes

Monday, April 13th, 2009

So back to my blog theme, I took some time to work out a new personalized theme.

Starting point is the default theme which I suppose supports all WordPress features.

For making things a bit smoother, I installed wordpress locally , so that it would be easier to experiment with the theme files.

Some words on this…

On my fileserver, I still have a MySQL database, so I didn’t have to install a new db on my local machine. I would be ok to have MySQL on the local machine but don’t like too many local server applications like databases, because I suppose this would slow down my desktop especially when starting up.

The fileserver with MySQL has an Apache with phpMyAdmin running on it. Through this interface I could create a new WordPress database, and create a user with access grants on that db.

My mistake was in creating the user with the necessary access rights. This is not something I do very often; so I copied this from a web page:

GRANT ALL ON <wordpressdb>.* TO '<wordpressUser>'@'localhost' IDENTIFIED BY '<password>';

Make sure the single quotes are realy single quotes and not other kind of quotes like `

Also like in my case when the db is on a remote machine, and you need to access the db from another host, set the grant like this:

GRANT ALL ON <wordpressdb>.* TO '<wordpressUser>'@'%' IDENTIFIED BY '<password>';

I checked the user with my local SQL client SQuirrelSQL, so created a db alias with URL: jdbc:mysql://<dbserver>/<wordpressdb>

Then I enabled php on my local machine, connecting with the mysql db.

  • In /etc/apache2/httd.conf, make sure “LoadModule php5_module        libexec/apache2/libphp5.so” is uncommented.
  • Copied /private/etc/php.ini.default to /private/etc/php.ini. This is quite optional I suppose; just increase the error log level:  error_reporting = E_ALL

Installing WordPress is all well explained in this guide; and goes smooth via an web base install script. Well almost, just needed to set the right permissions on the wordpress source files.

I copied all wordpress files to a location of my choice: /Users/<MyLogin!>/workspace/wordpress.

Configured apache so that it could locate the files via a new conf file under /private/etc/apache2/other: wordpress.conf, containing:

Alias /Wordpress /Users/<MyLogin!>/workspace/wordpress

<Directory “/Users/<MyLogin!>/workspace/wordpress/”>
Options Indexes MultiViews
AllowOverride None
Order allow,deny
Allow from all
</Directory>

The after extracting and copying wordpress sources, I needed set the right file permissions, that is all directories drwxr-xr-x via a “chmod -R og+rx */” in de wordpress directory (and for the wordpress directory itself) and all files “-rwxr–r–

Also copy the wp-config-sample.php to wp-config.php and set the database connection values in this file.

And concluding all of this via “http://localhost/Wordpress/wp-admin/install.php”, now returning:

Wordpress installed...

WordPress installed…

Starting out with Git version control in ProjectLocker

Wednesday, April 8th, 2009

While working on some personal programming gem, thought I need to have version control on my development project. I’ve worked in the past with several systems (subversion, cvs, PVCS cause we had to…, Visual Sourcesafe long time ago), but recently a friend adviced me to look into Git.

Actually not a source control system but – as Linus calls it – a content-addressable filesystem. Still have to figure out how this all applies to my source code.

I have the gut feeling that the package itself or some of its integrations are not fully stable, but nevertheless want to take the risk, for the sake of learning something new, gaining some experience.

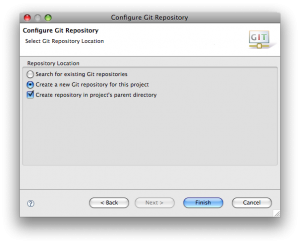
In Eclipse (Version: 3.4.2) took my project; context menu-ed Team/Share Project...
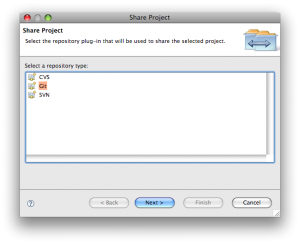
Select Git source controlafbeelding-4

This created a local git repository.

Now I could add my project files to the local repository via selecting my project, right-click (context menu) “Team/Track (add)”; and then “Commit

Next step was to link with a remote repository, in my case via Projectlocker.com.

Linking with a remote repo happens via ssh, and needs a public-private key.

On my Mac this happens like this:

$ cd ~/.ssh

$ ssh-keygen

<enter> // defaulting to id_rsa

<passphrase>

<passphrase again>

Creates 2 files id_rsa & id_rsa.pub

The public key file (id_rsa.pub) needs to be communicated to projectlocker.com. Nice trick is copy it to the clipboard via:

$ cat id_rsa.pub | pbcopy

Now login into projectlocker and goto Manage Public Keys: New Key with Name: <name_your_machine>; User Name: <user name: you can copy the name at the end of the id_rsa.pub file, like alias@localmachinename.local>; key <copy paste from the id_rsa.pub which is in the clipboard>

Now projectlocker should accept ssh connections from your machine to your repo.

Tip: trouble shoot the connect in case of issue via:

ssh -vi ~/.ssh/id_rsa <SshUser@server>

in my case:

ssh -vi ~/.ssh/id_rsa git-<my-project-locker-project-name>@free2.projectlocker.com

in the logs generated from this command I could find: ‘debug1: Authentication succeeded (publickey).’

Which sounds like ok.

Now i believe it’s worth restarting Eclipse in case it were started already. Not sure but had some trouble authenticated from Eclipse to the remote repository as long as I didn’t restart.

In projectlocker there is a connection string (URI) for your project, under “User Home” there is mention “Your Git Location: <URI>”. Copy paste this URI.

Using it in eclipse: Select your project, context menu “Team/Push To….“.
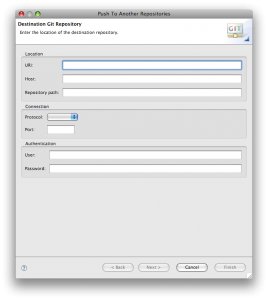
afbeelding-5

By typing the location string, most field got populated. Don’t add anything; only if password is request after clicking next  provide the rsa public/private key password as entered above when generating the ssh keypairs.

Next>

For the first export to the projectlocker server, click “Add all branches spec” button and click “Force update all specs” and click next. All files are then promoted to the projectlocker repository.
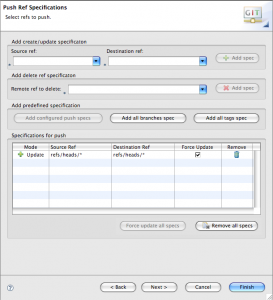
Push ref Specifications

This starts the process to publish the project’s files to the project locker.

The files can be verified in project locker via “Browse Source”.

Concluding: a git local repository has been created. This will be used for all local updates. The remote repository will be kept in sync only at specific steps.

Next step is to link the projectlocker’s issue tracking via trac and mylyn (locally)

Choosing a blog theme…

Sunday, April 5th, 2009

Making a blog with one of the default installed themes would be a bit too simple and just not done for me. Not that I dislike the default themes, and not that I am a web design specialist, I’m more into the applications behind the look & feel, just found that I needed some kind of personalized theme on this blog. On the other hand, don’t have the time to make a theme from scratch.

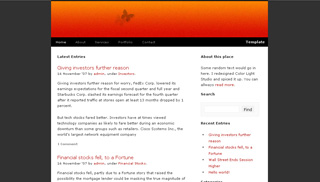
So I went to find out a theme in the wordpress themes directory. Still didn’t find what would please me. So I looked a little further by googling. Like a real dummy, I would search for ‘best WordPress themes'; thought this would bring me to some commercial web offering… Anyway I came to – you name it – Best WordPress Themes, a pretty useful site. So I found the 45 Degrees theme. That should be the theme for this blog.

45 Degrees template

45 Degrees template

Looked ok, simple enough for some customizations; after trying a couple of other themes that didn’t work out well.

So far so good. Only this wordpress theme dates back from October 2007 and the wordpress version 2.7 is not well supported.
So found this doc on the wordpress site explaining the impact on themes from this new wordpress version.

Did some tweaks to the 45 Degrees theme to let it work a little better under 2.7:

  • Updated the footer.php to include <?php wp_footer(); ?> before the </body> tag.
  • Took a copy of the comments.php from the default theme.

This looks already better, but I guess I need to adapt more; and there a good change I may have to fork away from this theme.

Hello world!

Saturday, April 4th, 2009

Hopsa.

This is my first entry in the blog world; hope I can bring something worth reading for the world out there; at least part of you out there.

Probably most of my post will be about software, ICT in general, sport maybe, anything else…

While trying to be constructive; not harm any person or organization.

Best,


Copyright © 2018 Design4s.com
Design4s – DesignForce / Design for software powered by WordPress - Entries (RSS).