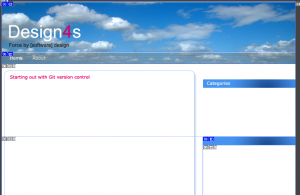
So as mentioned before, here’s part 2 of making my own theme.
I’ve already created a local WordPress install, which is not strictly necessary but allows for easy editing of the local php-files and simply clicking refresh in the browser to see the result. Rather then downloading files from the blog server, edit, re-upload and check in the preview… Not only more steps, it’s also slower.
My strategy is to take the default theme, and try to stick as much as possible with CSS modifications only.
Not sure yet if this will work out completely…
In fact the CSS file is not that hard to follow, and I need only to change header and footer backgrounds, and some minor tweaks.
What first seemed easy wasn’t. So I took it all upside down. Starting over drawing a brand new design in Photoshop, a nice opportunity to get into some of the possibilities of this tool; found an image from my pictures library, and took it as a base for the new web design.
Finally, the images generated from slicing in Photoshop were collated to the default theme.

Preparation of the design
Then further changes were necessary beyond the CSS. Like the page menus from the sidebase had to be on top of the page. It didn’t seem obvious to do the positioning with the current html structure, so I needed to get into the php template files.
This took me quite some time, but finally I get more or less where I wanted to be with the new theme. I guess there might be some thing that have to be updated later on, but for now it should be ok.
It’s about time to publish the theme and my this blog available via the root index of the website.